
The hike up to Half Dome in Yosemite National Park is pretty hard to beat. You have two unbelievable waterfalls, loads of habitat types, incredible views, the unique experience of the cables up the granite dome of Half Dome, and the opportunity to stand on a national park icon with sweeping views.
** Note that while you don’t need a permit to hike to Vernal Fall and Nevada Fall, you will need one to climb the last bit up to Half Dome itself. This permit and information can be found on the park’s website for the hike.

The trailhead for the Mist Trail and John Muir Trail starts on the east side of the Happy Isles Bridge. I walked to it from the Yosemite Valley Trail parking lot right across the Upper Pines Campground. If you hop on the park’s shuttle system, you can get off on the west side of the bridge.
From there I was on a trail proper where myself and other park visitors (there are plenty on this trail) follow the Merced River as it emerges from the gorge. It doesn’t take long, however to enter into the oak forest and begin steeply climbing up the paved path through massive boulders. The river is occasionally visible down below, but the chatter fills the canyon.
After some very steep hiking up, the trail levels out as it crosses over the river on a great bridge giving you more views of the river as it crashes around the boulder field on its way down into Yosemite Valley. (Conveniently, there is a restroom on the other side of the bridge.)
Once on the other side of the river, the trail resumed its aggressive march up the canyon, this time with more views of the river to keep me company. I took a left to travel up the Mist Trail (on the way back, I came down the John Muir Trail which was straight ahead). The trail slightly eased its grade and the top of Vernal Fall came into view. Wow. Each step revealed more of this gorgeous waterfall which dropped over a tall, sheer cliff as a solid sheet and crashed in a pool below spraying mist into the air.

Across from the waterfall, the trail stepped up through the lush, green vegetation constantly being bathed by the waterfall. The trail was not only very steep, but it was also a bit slick. I stopped repeatedly to admire the improving views of the waterfall as I caught my breath.
The trail then broke away from the waterfall and steeply climbed out of the canyon through steps hewn into the cliff walls. I popped out onto the shelf above the waterfall where the trail came alongside the top giving another great view as the river careened over the edge. Just above the waterfall, the water slows in a beautiful pool called Emerald Pool. Feeding into the pool, the river fans out across slabbed granite in a formation known as Silver Apron.
Just above Silver Apron, the trail crosses over the river once again giving you your first glimpses of Nevada Fall. I’d seen the waterfall from the top and alongside it when I did the Four Mile and Panorama Trail, but seeing it from the bottom of the canyon was a real treat.

This briefly level section ends as I started climbing in earnest again alongside the waterfall. The trail once again is hewn from the granite and steeply switchbacks up to a junction with the John Muir Trail. At that junction, I came across a string of mules hauling gear/equipment up through Little Yosemite Valley. I took a left at the junction and made my way up through the lower stretch of the valley where the trail became a lovely stroll through a mix of manzanita and large trees. While the Merced River was a frothy rage down below, up here it lazily worked its way down.
After a bit of level walking, the trail began climbing up through the trees, switchbacking through mixes of habitat types, shrubby, forested, etc. Views were scant, but other hikers, Pileated Woodpeckers, Western Gray Squirrels, and California Ground Squirrels kept me company.
The John Muir Trail takes a hard right as it heads up towards the Tuolumne area (and an optional route up to Clouds Rest), but I stayed straight where the trail, once again, started aggressively climbing once again… I did have a summit to reach after all.
After a bit of working hard for about 400ft elevation gain, the trail began easing its aggressive grade as it finally made it up onto the ridge, giving some views of Clouds Rest to the northeast and the Tenaya Canyon directly north. I began following the ridgeline where views started to get better and better as the trees began thinning out.
The trail levels out once again as it easily strolls through slab granite with large trees scattered about. I approached the sign that notified me that only hikers with a climbing permit can proceed. This stretch was another series of tight, stepped switchbacks carved into the stone. By this time, you’ll definitely feel it (as I sure did) after the amount of climbing combined with a bit of elevation. With each step up onto Sub dome, Half Dome rises in front of you.
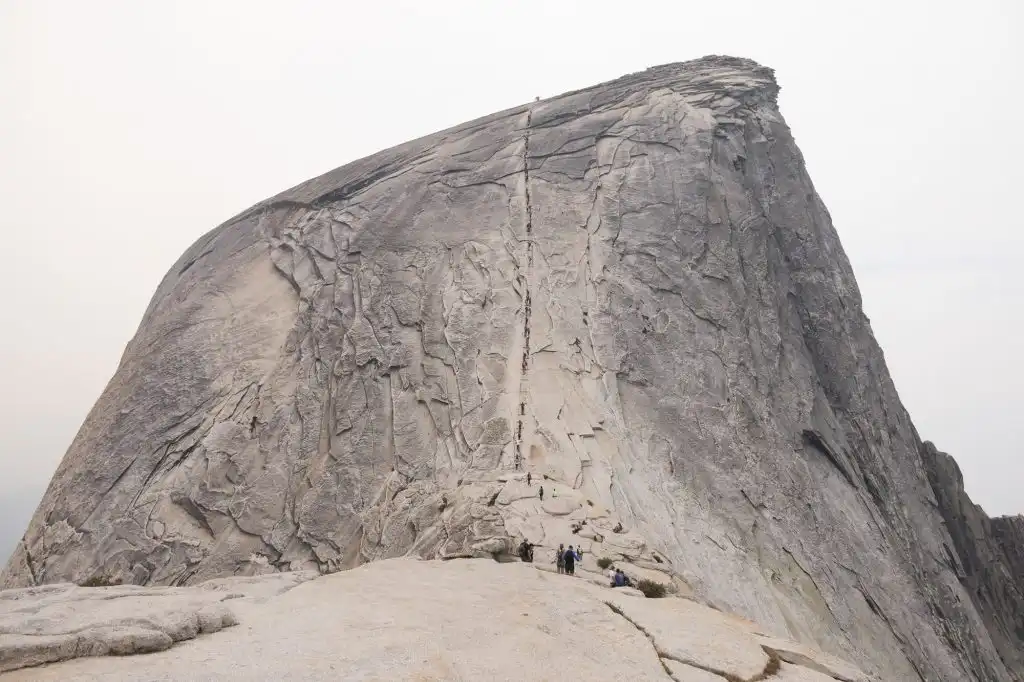
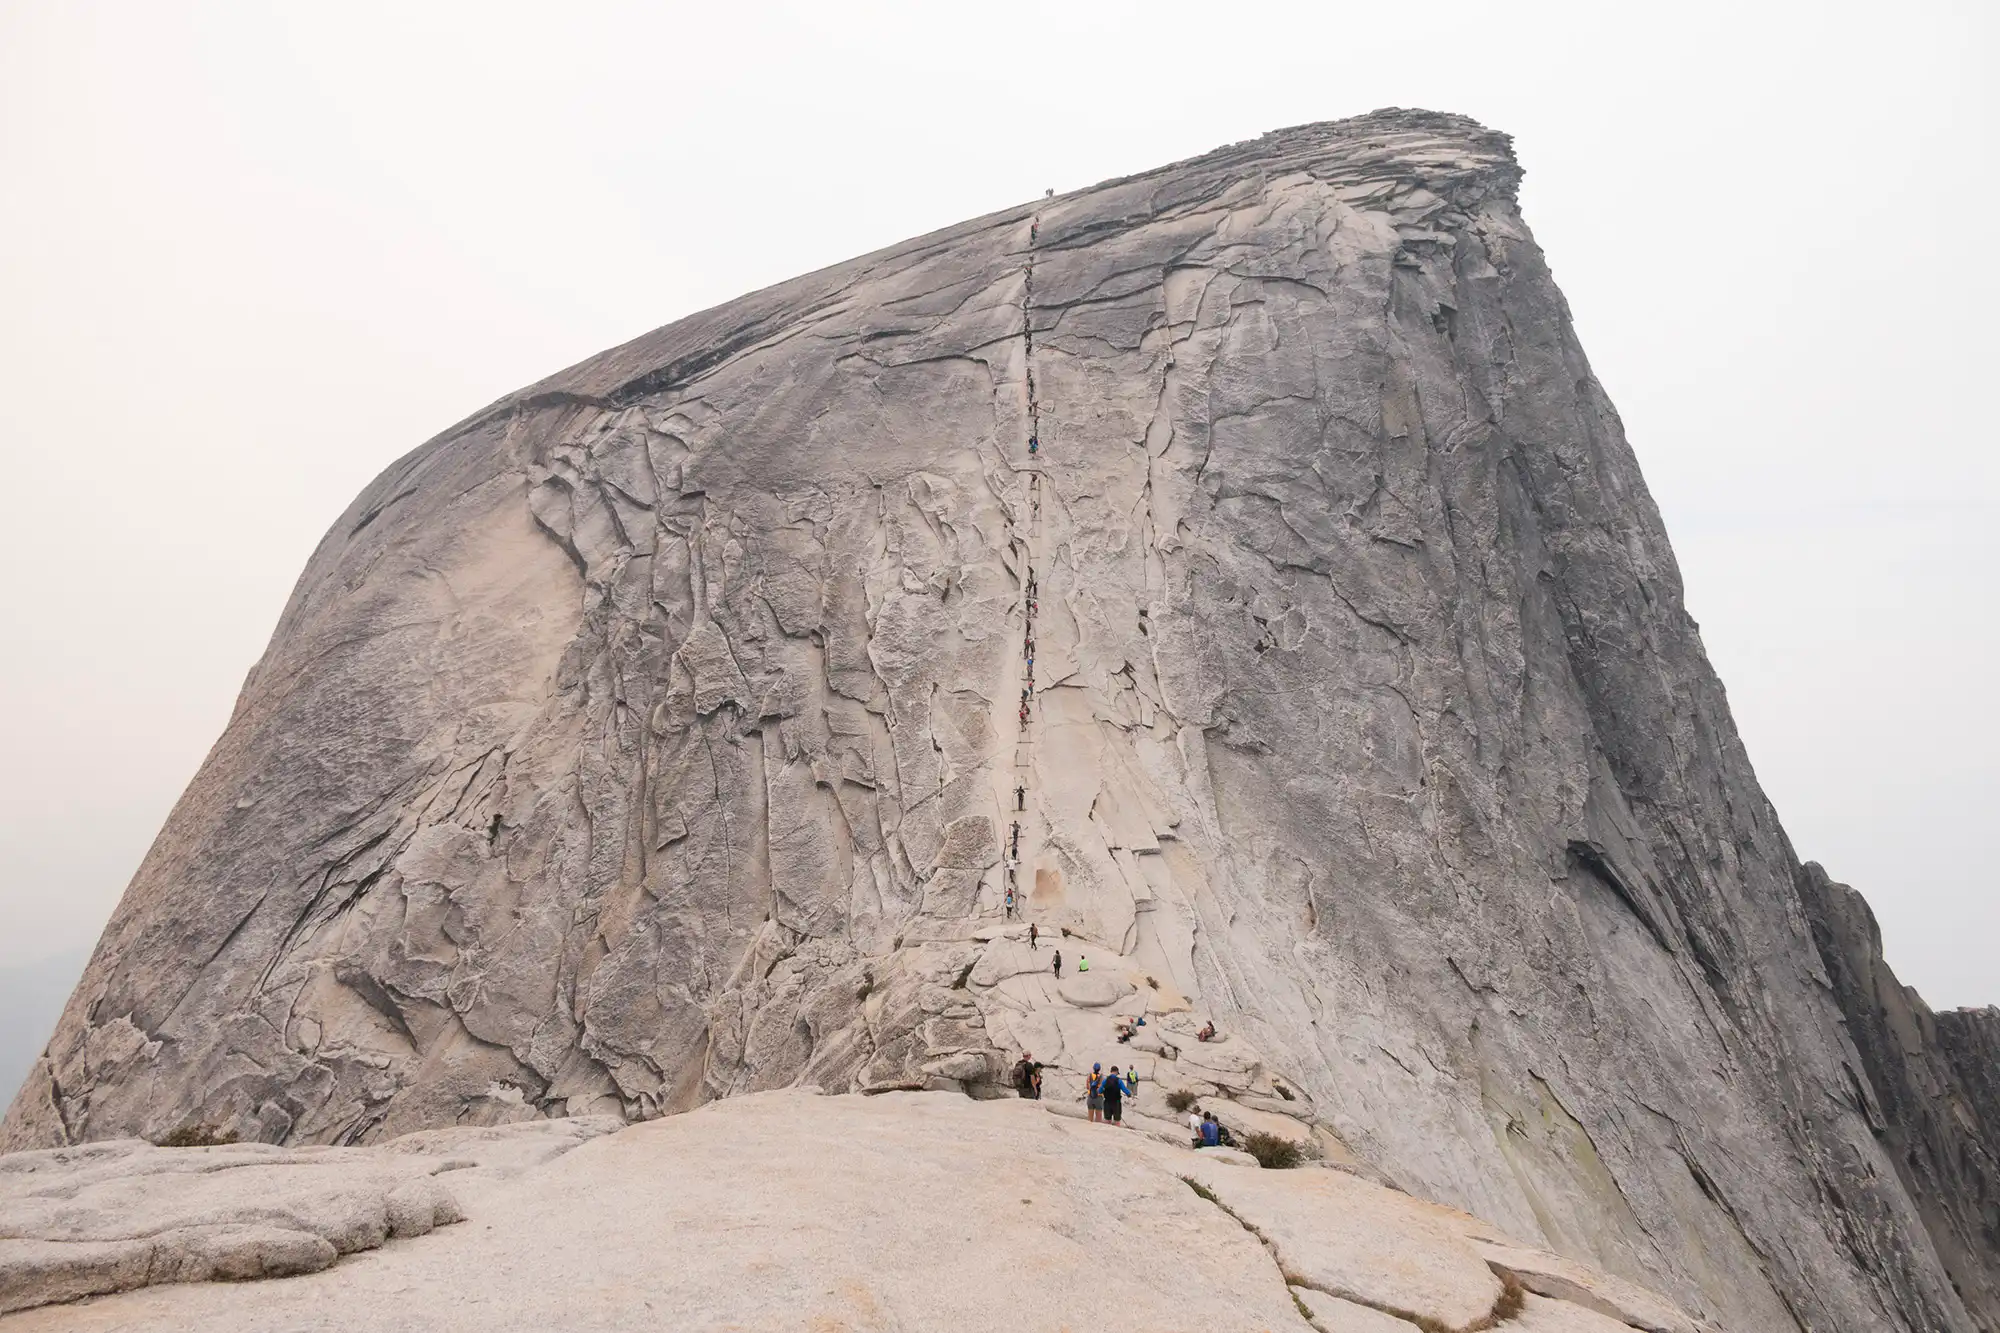
I finally got a good look at the cables and the string of people going up and down it when I arrived at the saddle between the two domes. I took out my gloves as I approached the cable section and got in line. (There was a pile of gloves that I could have borrowed from. Make sure that you bring some as you will spend some time holding on. The sticky work gloves work best!)
The way the cable system works is that there are posts drilled into the granite all the way up with cables threaded through the top of them. At each pair of posts, a wooden board is laid across the path. The granite is worn fairly smooth and lacks the tackiness that you often get from granite, so the easiest place to stop is on top of the boards… and you will have to stop and wait.
There are folks going up and coming down through this narrow “corridor” on a very steep aspect. You can only go as fast as the slowest person, so be patient and take your time up.
I eventually made it to the top where the summit has a couple of humps and incredible views. It was a smoky day so the haze obscured some views, but even with smoke, the views were incredible. Yosemite Valley, Clouds Rest, Tenaya Canyon, Mount Starr King, and a sea of summits to the north. I wandered around the slabs of granite, went out to the point above the cliff facing north, and just soaked in the views. A Peregrine Falcon soared above the summit while people took endless photos and ate their lunches.
I was not looking forward to going back down the cable section, but thankfully many people had left, so it wasn’t as busy. Going up, you have the slab right in front of you so it doesn’t feel as steep. Coming down, however, it’s a lot of air which doesn’t always bother me, but with the slick rock and folks going by me, let’s just say that there was less anxiety when I arrived back down at the glove pile.
From there I retraced my steps back down to the junction with the Mist Trail, but I stayed straight to cross over the top of Nevada Fall. Just before I reached the waterfall I heard the ground squirrels calling out alarm calls and some movement of rusty fur caught my eye. It was a Bobcat!! I’d never seen a cat from the trail in all of my hiking and here was one hunting. Beside myself I was able to get a couple of shots of it and a bit of video before it disappeared in the manazita.
I continued on to the top of Nevada Fall. It’s so fun to be able to hang out at the top of these tall, powerful falls and have a different route on the way down. After the waterfall, the trail traverses a cliff with amazing views of the waterfall backdropped by Liberty Cap and Half Dome before switchbacking down through the trees, joining up with the Mist Trail, crossing over the river and following it back down to the Happy Isles Bridge.
The hike overall is a ton of work and gains a whopping 5,400ft of elevation over 16 miles. That being said, it is a super rewarding hike with legendary waterfalls and unique experiences on the way to one of the most famous summits in America. If you can do it, you should.
Leave a Reply